Solar X-rays:
![]()
Geomagnetic Field:
![]()
From n3kl.org


The THS membership box will have a two button interface for the user to operate the machine. One will select a membership payment, and the other will select a 1000 yen donation. I wanted to be sure that the user knew intuitively when a particular option was available. In addition to the UI, these buttons play a role in the administration menu as well.
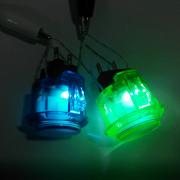
Early on I planned on having an LED indicator associated with each button, to indicate the active buttons. I remembered seeing these small transparent arcade buttons and thought they would look particularly nice if they were illuminated. It makes perfect sense to hide the LED within the button.
I picked up two buttons and began hacking.
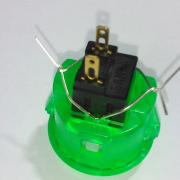
After taking them apart, it was clear that there is plenty of room within the housing for two LEDs. The only issue was how to hack them in.
My first idea was to use some surface mount LEDs. I found some angel hair wire and set to work soldering them to the TINY LED pads. This was frustrating and under the lens, not pretty, but they did work. I noticed that with a resistor, they are not so bright but work running without the resistor.
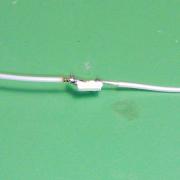
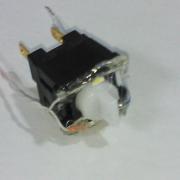
After soldering tiny wires to the tiny LEDs, I used some hot melt glue to attach them to the switch box, which is then inserted in the button housing. After a test fit of the button cap, I found that the side tabs of the button cap usually hit up against the LED, wires and mess of hot melt glue. So I went ahead and snipped the tabs back a bit to make them shorter.
Now how to assemble them, such that the wires come out of the casing freely? At first I thought of drilling two holes for the wires. Then I quickly realized I could just cut some V notches in the case and it would fit back together nicely.
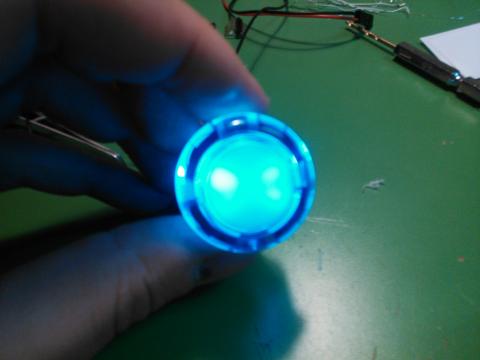
I reassembled them and gave them a test run. The first image of the post shows how beautiful they look.

Sadly, after only a few button presses, the LEDs stopped working. The button cap was smashing the wires and LED, causing the wires to break off.
Time for a new plan.
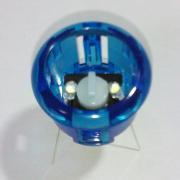
I had been testing out my Joule Thief circuit with a white 3mm LED. I noticed that The shape of the button cap ment that there was two locations that would straddle down over the 3mm LEDs if positioned right, and the wire leads would come out right at the V notches I cut! I just put the switch box back into the casing, slipped two LEDs into the V notches and snapped the button cap back in. PERFECT FIT! And so much easier to put together. Now that I know this trick, I plan on modding a whole bunch of these for other projects. They just look so great with the LEDs inside.
Theme by Danetsoft and Danang Probo Sayekti inspired by Maksimer